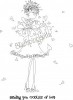
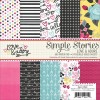
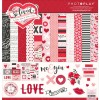
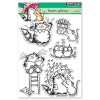
The card features an awesome stamp by Stamping Bella (Uptown Girl Lucille Sends Her Love). I Copic colored her and popped up the image on this fun patterned paper.
For the inside of the card I used some more patterned paper, the sentiment from the stamp set and a Valentines border by Lawn Fawn.
See below for a link to my YouTube video for a tutorial of this project.
This fun card was created with Art Impressions stamp UM4215. This fun little lady was Copic colored and popped up off some paper from Simple Stories. The "I Love You" was embossed with red powder and a fun border was die cut with Lawn Fawn Valentines Borders.
The inside of this card was done with Simon Says Stamp Love Quotes stamp set, Schoolhouse red dye ink, tumbled glass and spun sugar distress inks.
This cute little guy is an image from Laurie Furnell's Pinterest site. I just printed and cut him out and popped him up. He is popped up on a piece of neenah card stock that was die cut with Simon Says Stamp stitched rectangles and embossed with a scallop embossing folder then lightly rubbed with tumbled glass distress ink and Spectrum Noir clear sparkle overlay.
This wonderful card features a SNEAK PEAK image from Hayseed Stamp & Die Co. Just adding some hearts to this old farm bucket, a fun sentiment, patterned paper and it becomes an awesome Valentines Card. Stay tuned for more sneak peak images from Hayseed.
I love looking around the house and finding different things to customize and dress up! My Cricut gives me the ability to do this to just about anything. I was in my pantry pulling ingredients for a pasta dinner and thought my plain pasta jar needed some life!
So I went to Design Space and searched the word "pasta" then looked in the Ornamental Iron 2 collection and found the brackets. I think it turned out pretty cute!
Cricut is offering free shipping for the month of February 2017 with the code LOVESHIP.
Stay tuned for a great President's Day sale from Cricut!
**This post contains affiliate links and I will be compensated if you make a purchase after clicking on my links. Thank you for supporting Creations By Carol. I appreciate you so much!
This card is full of different techniques. I first stamped my focal image and masked it with masking paper. I then used the background stamp and peeled away the masking paper to reveal the magic! I Copic colored the image. The colors I used are noted on the screen in the video below. I framed the image with strips of patterned paper from Simple Stores Love & Adore as well as a little Spun Sugar Distress Ink around the edges.
On the inside of the card I did inlay die cutting and added a simple sentiment stamp. And my finishing touches were Glossy Accents and Spectrum Noir clear overlay sparkle.